martedì 14 aprile 2020

.NET Core IoT Libraries on Friendly ELEC NanoPi M1 Plus

In the wake of the previous note, Set Up .NET Core 3.1 ARM Development Toolchain with Visual Studio Code, this time the goal is to check whether Microsoft's .NET Core IoT Libraries works also with the NanoPi M1 Plus even if this device is not in the list of supported devices.


Following the instructions in the led-blink sample, we will connect pin 17 (GPIOA17) to the cathode of a LED interposing a resistor, and pin 39 (GND) to the anode.

    class Program
            {
                static void Main(string[] args)
                {
                    var pin = 17;
                    var lightTimeInMilliseconds = 1000;
                    var dimTimeInMilliseconds = 200;
        
                    Console.WriteLine($"Let's blink an LED!");
                    using (GpioController controller = new GpioController())
                    {
                        controller.OpenPin(pin, PinMode.Output);
                        Console.WriteLine($"GPIO pin enabled for use: {pin}");
        
                        Console.CancelKeyPress += (object sender, ConsoleCancelEventArgs eventArgs) =>
                        {
                            controller.Dispose();
                        };
        
                        while (true)
                        {
                            Console.WriteLine($"Light for {lightTimeInMilliseconds}ms");
                            controller.Write(pin, PinValue.High);
                            Thread.Sleep(lightTimeInMilliseconds);
                            Console.WriteLine($"Dim for {dimTimeInMilliseconds}ms");
                            controller.Write(pin, PinValue.Low);
                            Thread.Sleep(dimTimeInMilliseconds);
                        }
                    }
                }
                

The code above, copied and pasted from the sample, is self-explanatory, in fact
  1. we select pin 17 and configure it as an output

    controller.OpenPin(pin, PinMode.Output);

  2. turn the LED on for 1 second

                        controller.Write(pin, PinValue.High);
                                Thread.Sleep(lightTimeInMilliseconds);
                            

  3. then we turn it off for 200 ms

                        controller.Write(pin, PinValue.Low);
                                Thread.Sleep(dimTimeInMilliseconds);                    
                            

  4. repeat from point 1.
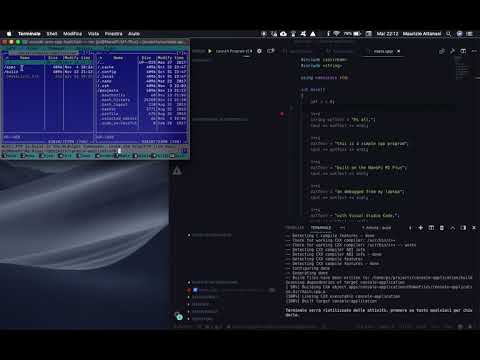
As we've done in the previous note, we will configure our tasks.json and launch.json files in order to allow remote debugging via ssh

Only one caveat has to be considered this time in order to allow vsdg to change the mode of a pin.
In fact, this operation requires root permissions, and to get this result, one possible way is to prepend sudo before the vsdbg path in the launch.json configuration.

            "debuggerPath": "sudo ~/vsdbg/vsdbg"
                

The following video shows a remote debug test of the program, and demonstrate that.
  • The Microsoft .NET Core IoT Libraries works as expected;
  • We are able to use the remote debugger stopping code execution at our breakpoints


The code of this note is available here on my Github repo.

As always

Enjoy,

and if we are still under COVID-19 attack, #staysafe, #StayAtHome.


domenica 5 aprile 2020

Set Up .NET Core 3.1 ARM Development Toolchain with Visual Studio Code

In the previous post, I described the steps followed to set up a remote development toolchain for c++ programming on an ARM-based microcontroller (in my case, a Friendly ELEC NanoPi M1 Plus, but the same steps should be valid on the more popular RaspberryPi ).


In this note, I'll try to do something similar but using the latest long time support version of dotnet core, 3.1 LTS (ver. 3.1.201 at the time of writing this post).

Pi Setup

As for the C++ setup, we will use ssh to connect our debugger to the Pi. To debug we'll need root privileges, and to obtain this result we need to enable ssh connection using root.
To get this result we need to edit the sshd_config configuration file by running:

sudo nano /etc/ssh/sshd_config

check if the line

PermitRootLogin yes

exists or, in the case, add it and then reboot the Pi

sudo reboot


.NET Core setup

First thing first we need to install .net core SDK on the Pi. Following the instruction available on the sdk's download page on our ssh command line we will run the following commands:

~$ sudo apt-get install curl libunwind8 gettext
        
~$ wget https://download.visualstudio.microsoft.com/download/pr/ccbcbf70-9911-40b1-a8cf-e018a13e720e/03c0621c6510f9c6f4cca6951f2cc1a4/dotnet-sdk-3.1.201-linux-arm.tar.gz                 
        

The next step is to extract the packages we downloaded, and make the dotnet commands available at the terminal

~$ mkdir -p $HOME/dotnet && tar zxf dotnet-sdk-3.1.201-linux-arm.tar.gz -C $HOME/dotnet
~$ export DOTNET_ROOT=$HOME/dotnet
~$ export PATH=$PATH:$HOME/dotnet
        

In order to verify the installation, in our ssh terminal, run the dotnet --info command. If everything is ok something like this should appear.

As stated in the .NET Core download page

The above commands will only make the .NET SDK commands available for the terminal session in which it was run.
You can edit your shell profile to permanently add the commands. There are a number of different shells available for Linux and each has a different profile. For example:
  • Bash Shell: ~/.bash_profile, ~/.bashrc
  • Korn Shell: ~/.kshrc or .profile
  • Z Shell: ~/.zshrc or .zprofile
Edit the appropriate source file for you shell and add :$HOME/dotnet to the end of the existing PATH statement. If no PATH statement is included, add a new line with export PATH=$PATH:$HOME/dotnet.
Also, add export DOTNET_ROOT=$HOME/dotnet to the end of the file.

VS Remote Debugger Setup

To install the vscode remote debugger on the NanoPi, on the ssh terminal rin the command:

~$ curl -sSL https://aka.ms/getvsdbgsh | /bin/sh /dev/stdin -v latest -l ~/vsdbg

Visual Studio Code remote debugging test

Now it's time to test the whole toolchain.

On our development machine (in my case an old MacBook Pro 15), we need the dotnet SDK installed, and, of course our favorite code editor Visual Studio Code.

To achieve the goal, we will use a simple console application named toolchain-test

In order to verify the machine on which we are running our simple test program we'll change the code as follows:

    using System;

    namespace toolchain_test
    {
        class Program
        {
            static void Main(string[] args)
            {
                var logName = Environment.GetEnvironmentVariable("LOGNAME");
                Console.WriteLine($"Hello World! from {logName}");
            }
        }
    }                
            

As we did for the C++ toolchain we will make use of rsync, a copying tool available on macOS, Linux, and now also on Windows 10 via the Windows Subsystem for Linux or WSL2 so our task.json and launch.json files will be:

        {
            "version": "2.0.0",
            "tasks": [
                {
                    "label": "build",
                    "command": "dotnet",
                    "type": "process",
                    "args": [
                        "build",
                        "${workspaceFolder}/toolchain-test/toolchain-test.csproj",
                        "/property:GenerateFullPaths=true",
                        "/consoleloggerparameters:NoSummary"
                    ],
                    "problemMatcher": "$msCompile"
                },  
                {
                    "label": "publish",
                    "command": "dotnet",
                    "dependsOn": "build",
                    "type": "process",
                    "args": [
                        "publish",
                        "-r",
                        "linux-arm",
                        "${workspaceFolder}/toolchain-test/toolchain-test.csproj",
                        "/property:GenerateFullPaths=true",
                        "/consoleloggerparameters:NoSummary"
                    ],
                    "problemMatcher": "$msCompile"
                },
                {
                    "label": "rsync",
                    "type": "shell",
                    "dependsOn": "publish",
                    "osx": {
                        "command": "rsync -r -a -v -e ssh --delete toolchain-test/bin/Debug/netcoreapp3.1/linux-arm/ pi@192.168.1.177:/home/pi/projects/toolchain-test/"
                    }
                },
                {
                    "label": "watch",
                    "command": "dotnet",
                    "type": "process",
                    "args": [
                        "watch",
                        "run",
                        "${workspaceFolder}/toolchain-test/toolchain-test.csproj",
                        "/property:GenerateFullPaths=true",
                        "/consoleloggerparameters:NoSummary"
                    ],
                    "problemMatcher": "$msCompile"
                }
            ]
        }        
    

        {
            // Use IntelliSense to find out which attributes exist for C# debugging
            // Use hover for the description of the existing attributes
            // For further information visit https://github.com/OmniSharp/omnisharp-vscode/blob/master/debugger-launchjson.md
            "version": "0.2.0",
            "configurations": [
                {
                    "name": ".NET Core Launch (console)",
                    "type": "coreclr",
                    "request": "launch",
                    "preLaunchTask": "build",
                    "program": "${workspaceFolder}/toolchain-test/bin/Debug/netcoreapp3.1/toolchain-test.dll",
                    "args": [],
                    "cwd": "${workspaceFolder}",
                    "console": "internalConsole",
                    "stopAtEntry": false
                },
                {
                    "name": ".NET Core Remote Launch - Standalone Application (console)",
                    "type": "coreclr",
                    "request": "launch",
                    "program": "toolchain-test",
                    "args": [],
                    "cwd": "~/projects/toolchain-test",
                    "stopAtEntry": false,
                    "console": "internalConsole",
                    "pipeTransport": {
                        "pipeCwd": "${workspaceRoot}",
                        "pipeProgram": "/usr/bin/ssh",
                        "pipeArgs": [
                            "-T",
                            "pi@192.168.1.177"
                        ],
                        "debuggerPath": "~/vsdbg/vsdbg"
                    },
                    "preLaunchTask": "rsync",
                },        
                {
                    "name": ".NET Core Attach",
                    "type": "coreclr",
                    "request": "attach",
                    "processId": "${command:pickProcess}"
                }
            ]
        }        
    

In the launch.json we have two configurations, a local and a remote one.

Selecting the local one:


and pressing F5, the program will stop at the breakpoint as we can see in the following picture:


and the program output will be:


Selecting the remote debug configuration, we will have instead:


As we can see, in the first test, the logName variable assumes the development machine LOGNAME environment variable value, while in the second it assumes the Pi's one.

The code of this note is available here on my Github repo.

As always

Enjoy,

and if we are still under COVID-19 attack, #staysafe, #StayAtHome.


martedì 3 marzo 2020

Set Up C++ ARM Development Toolchain with Visual Studio Code

<TLDR></TLDR>The final goal this note is to simulate remote debugging of Microsoft Visual Studio 2017© on a Linux target computer (e.g. a tiny ARM computer, such as a Raspberry Pi © or a FriendlyARM NanoPi M1 Plus ©), but using Microsoft Visual Studio Code ©.

How Visual Studio 2017 does


Following the great Scott Hanselman's article Writing and debugging Linux C++ applications from Visual Studio using the “Windows Subsystem for Linux”, let’s try to create a Cross-Platform Linux Console Application project with Visual Studio 2017.

Figure 1 - New Project

The next step is to configure the IDE to connect via ssh, to the remote Linux client. From the Tools->Options... menu, search for the Cross Platform->Connection Manager item

Figure 2 - Connection Manager

and click on the Add button

Figure 3 - Connect to Remote


and fill it with the ssh coordinates of the target client. Now we’re ready, let’s build our simple project and see what appens.

Figure 4 - Build Output


Debug mode


The first time we’ll compile our project in Debug Mode, set a breakpoint in the source file and start a debug session. As shown in the following images the debugger stops correctly at the breakpoint,

Figure 5 - Breakpoint


and the output is

Figure 6 - Linux Console

Release mode


For sake of completness, let’s compile our project also in Release Mode

Let’s sum up

Reading the build output shown in Figure 4, the steps taken by the full fledged IDE are:

  1. Validating sources;
  2. Copying sources remotely to ‘192.168.0.101’;
  3. Validating architecture;
  4. Starting remote build;
  5. Compiling sources: main.cpp;
  6. Start a debug session of the program running on the remote target;
Omitting the first step, the following are the ones that we will try to reproduce with Visual Studio Code©

Sources copy

So the thing VS2017 does is copying all the necessary files to the remote target. Taking a close look to what has been copied, we have:

└── projects
    └── ConsoleApplication1
        ├── bin
        │   └── ARM
        │       ├── Debug
        │       │   └── ConsoleApplication1.out
        │       └── Release
        │           └── ConsoleApplication1.out
        ├── main.cpp
        └── obj
            └── ARM
                ├── Debug
                │   └── main.o
                └── Release
                    └── main.o

10 directories, 5 files
pi@NanoPi-M1-Plus:~$

We know that for that purpose, the IDE uses the previously configured ssh connection with the target. For that result we can use the same ssh connection to issue a rsync command, through a VSCode Task,
{
    // See https://go.microsoft.com/fwlink/?LinkId=733558
    // for the documentation about the tasks.json format
    "version": "2.0.0",
    "tasks": [
        {
            "label": "build",
            "type": "shell",
            "command": [
                "rsync -r -a -v -e ssh --delete --exclude '.vscode' $ {workspaceFolder}/ pi@192.168.0.102:/home/pi/projects/console-application/"
                ]
        }
    ]
}

Build project

With the same tecnique above we can also create the necessary folder structure and build our simple project
{
    // See https://go.microsoft.com/fwlink/?LinkId=733558
    // for the documentation about the tasks.json format
    "version": "2.0.0",
    "tasks": [
        {
            "label": "build",
            "type": "shell",
            "command": [

                ...

                "&amp;&amp;",
                "ssh pi@192.168.0.102",
                "'mkdir /home/pi/projects/console-application/build",
                "&amp;&amp; cd /home/pi/projects/console-application/build",
                "&amp;&amp; cmake .. &amp;&amp; make'"
            ]
        }
    ]
}

Debug

Last but not least we need a proper way to debug remotely our application. For that purpose we’ll configure a debug session using the VSCode C++ debugger features.
add-debug-config
First of all, from the debug launch dropdown menu

launch-over-ssh


{
    "configurations": [
        {
            "type": "gdb",
            "request": "launch",
            "name": "Launch Program (SSH)",
            "target": "./build/apps/console-application/console-application",
            "cwd": "${workspaceRoot}",
            "windows": {
                "ssh": {
                    "host": "192.168.1.2",
                    "cwd": "/home/pi/projects/console-application",
                    "keyfile": "C:\\Users\\mauri\\.ssh\\id_rsa",
                    "user": "pi",
                }
            },
            "osx": {
                "ssh": {
                    "host": "192.168.1.2",
                    "cwd": "/home/pi/projects/console-application",
                    "keyfile": "/Users/maurizioattanasi/.ssh/id_rsa",
                    "user": "pi",
                }       
            },
            "linux": {
                "ssh": {
                    "host": "192.168.1.2",
                    "cwd": "/home/pi/projects/console-application",
                    "keyfile": "/Users/maurizioattanasi/.ssh/id_rsa",
                    "user": "pi",
                }       
            },
            "preLaunchTask": "build"
        }
    ]
}

Demo

In the following video, available on my YouTube Channel, there is a short demo of the toolchain in action.


Watch the video

The code of this note is available here


Enjoy