domenica 5 aprile 2020

Set Up .NET Core 3.1 ARM Development Toolchain with Visual Studio Code

In the previous post, I described the steps followed to set up a remote development toolchain for c++ programming on an ARM-based microcontroller (in my case, a Friendly ELEC NanoPi M1 Plus, but the same steps should be valid on the more popular RaspberryPi ).


In this note, I'll try to do something similar but using the latest long time support version of dotnet core, 3.1 LTS (ver. 3.1.201 at the time of writing this post).

Pi Setup

As for the C++ setup, we will use ssh to connect our debugger to the Pi. To debug we'll need root privileges, and to obtain this result we need to enable ssh connection using root.
To get this result we need to edit the sshd_config configuration file by running:

sudo nano /etc/ssh/sshd_config

check if the line

PermitRootLogin yes

exists or, in the case, add it and then reboot the Pi

sudo reboot


.NET Core setup

First thing first we need to install .net core SDK on the Pi. Following the instruction available on the sdk's download page on our ssh command line we will run the following commands:

~$ sudo apt-get install curl libunwind8 gettext
        
~$ wget https://download.visualstudio.microsoft.com/download/pr/ccbcbf70-9911-40b1-a8cf-e018a13e720e/03c0621c6510f9c6f4cca6951f2cc1a4/dotnet-sdk-3.1.201-linux-arm.tar.gz                 
        

The next step is to extract the packages we downloaded, and make the dotnet commands available at the terminal

~$ mkdir -p $HOME/dotnet && tar zxf dotnet-sdk-3.1.201-linux-arm.tar.gz -C $HOME/dotnet
~$ export DOTNET_ROOT=$HOME/dotnet
~$ export PATH=$PATH:$HOME/dotnet
        

In order to verify the installation, in our ssh terminal, run the dotnet --info command. If everything is ok something like this should appear.

As stated in the .NET Core download page

The above commands will only make the .NET SDK commands available for the terminal session in which it was run.
You can edit your shell profile to permanently add the commands. There are a number of different shells available for Linux and each has a different profile. For example:
  • Bash Shell: ~/.bash_profile, ~/.bashrc
  • Korn Shell: ~/.kshrc or .profile
  • Z Shell: ~/.zshrc or .zprofile
Edit the appropriate source file for you shell and add :$HOME/dotnet to the end of the existing PATH statement. If no PATH statement is included, add a new line with export PATH=$PATH:$HOME/dotnet.
Also, add export DOTNET_ROOT=$HOME/dotnet to the end of the file.

VS Remote Debugger Setup

To install the vscode remote debugger on the NanoPi, on the ssh terminal rin the command:

~$ curl -sSL https://aka.ms/getvsdbgsh | /bin/sh /dev/stdin -v latest -l ~/vsdbg

Visual Studio Code remote debugging test

Now it's time to test the whole toolchain.

On our development machine (in my case an old MacBook Pro 15), we need the dotnet SDK installed, and, of course our favorite code editor Visual Studio Code.

To achieve the goal, we will use a simple console application named toolchain-test

In order to verify the machine on which we are running our simple test program we'll change the code as follows:

    using System;

    namespace toolchain_test
    {
        class Program
        {
            static void Main(string[] args)
            {
                var logName = Environment.GetEnvironmentVariable("LOGNAME");
                Console.WriteLine($"Hello World! from {logName}");
            }
        }
    }                
            

As we did for the C++ toolchain we will make use of rsync, a copying tool available on macOS, Linux, and now also on Windows 10 via the Windows Subsystem for Linux or WSL2 so our task.json and launch.json files will be:

        {
            "version": "2.0.0",
            "tasks": [
                {
                    "label": "build",
                    "command": "dotnet",
                    "type": "process",
                    "args": [
                        "build",
                        "${workspaceFolder}/toolchain-test/toolchain-test.csproj",
                        "/property:GenerateFullPaths=true",
                        "/consoleloggerparameters:NoSummary"
                    ],
                    "problemMatcher": "$msCompile"
                },  
                {
                    "label": "publish",
                    "command": "dotnet",
                    "dependsOn": "build",
                    "type": "process",
                    "args": [
                        "publish",
                        "-r",
                        "linux-arm",
                        "${workspaceFolder}/toolchain-test/toolchain-test.csproj",
                        "/property:GenerateFullPaths=true",
                        "/consoleloggerparameters:NoSummary"
                    ],
                    "problemMatcher": "$msCompile"
                },
                {
                    "label": "rsync",
                    "type": "shell",
                    "dependsOn": "publish",
                    "osx": {
                        "command": "rsync -r -a -v -e ssh --delete toolchain-test/bin/Debug/netcoreapp3.1/linux-arm/ pi@192.168.1.177:/home/pi/projects/toolchain-test/"
                    }
                },
                {
                    "label": "watch",
                    "command": "dotnet",
                    "type": "process",
                    "args": [
                        "watch",
                        "run",
                        "${workspaceFolder}/toolchain-test/toolchain-test.csproj",
                        "/property:GenerateFullPaths=true",
                        "/consoleloggerparameters:NoSummary"
                    ],
                    "problemMatcher": "$msCompile"
                }
            ]
        }        
    

        {
            // Use IntelliSense to find out which attributes exist for C# debugging
            // Use hover for the description of the existing attributes
            // For further information visit https://github.com/OmniSharp/omnisharp-vscode/blob/master/debugger-launchjson.md
            "version": "0.2.0",
            "configurations": [
                {
                    "name": ".NET Core Launch (console)",
                    "type": "coreclr",
                    "request": "launch",
                    "preLaunchTask": "build",
                    "program": "${workspaceFolder}/toolchain-test/bin/Debug/netcoreapp3.1/toolchain-test.dll",
                    "args": [],
                    "cwd": "${workspaceFolder}",
                    "console": "internalConsole",
                    "stopAtEntry": false
                },
                {
                    "name": ".NET Core Remote Launch - Standalone Application (console)",
                    "type": "coreclr",
                    "request": "launch",
                    "program": "toolchain-test",
                    "args": [],
                    "cwd": "~/projects/toolchain-test",
                    "stopAtEntry": false,
                    "console": "internalConsole",
                    "pipeTransport": {
                        "pipeCwd": "${workspaceRoot}",
                        "pipeProgram": "/usr/bin/ssh",
                        "pipeArgs": [
                            "-T",
                            "pi@192.168.1.177"
                        ],
                        "debuggerPath": "~/vsdbg/vsdbg"
                    },
                    "preLaunchTask": "rsync",
                },        
                {
                    "name": ".NET Core Attach",
                    "type": "coreclr",
                    "request": "attach",
                    "processId": "${command:pickProcess}"
                }
            ]
        }        
    

In the launch.json we have two configurations, a local and a remote one.

Selecting the local one:


and pressing F5, the program will stop at the breakpoint as we can see in the following picture:


and the program output will be:


Selecting the remote debug configuration, we will have instead:


As we can see, in the first test, the logName variable assumes the development machine LOGNAME environment variable value, while in the second it assumes the Pi's one.

The code of this note is available here on my Github repo.

As always

Enjoy,

and if we are still under COVID-19 attack, #staysafe, #StayAtHome.


martedì 3 marzo 2020

Set Up C++ ARM Development Toolchain with Visual Studio Code

<TLDR></TLDR>The final goal this note is to simulate remote debugging of Microsoft Visual Studio 2017© on a Linux target computer (e.g. a tiny ARM computer, such as a Raspberry Pi © or a FriendlyARM NanoPi M1 Plus ©), but using Microsoft Visual Studio Code ©.

How Visual Studio 2017 does


Following the great Scott Hanselman's article Writing and debugging Linux C++ applications from Visual Studio using the “Windows Subsystem for Linux”, let’s try to create a Cross-Platform Linux Console Application project with Visual Studio 2017.

Figure 1 - New Project

The next step is to configure the IDE to connect via ssh, to the remote Linux client. From the Tools->Options... menu, search for the Cross Platform->Connection Manager item

Figure 2 - Connection Manager

and click on the Add button

Figure 3 - Connect to Remote


and fill it with the ssh coordinates of the target client. Now we’re ready, let’s build our simple project and see what appens.

Figure 4 - Build Output


Debug mode


The first time we’ll compile our project in Debug Mode, set a breakpoint in the source file and start a debug session. As shown in the following images the debugger stops correctly at the breakpoint,

Figure 5 - Breakpoint


and the output is

Figure 6 - Linux Console

Release mode


For sake of completness, let’s compile our project also in Release Mode

Let’s sum up

Reading the build output shown in Figure 4, the steps taken by the full fledged IDE are:

  1. Validating sources;
  2. Copying sources remotely to ‘192.168.0.101’;
  3. Validating architecture;
  4. Starting remote build;
  5. Compiling sources: main.cpp;
  6. Start a debug session of the program running on the remote target;
Omitting the first step, the following are the ones that we will try to reproduce with Visual Studio Code©

Sources copy

So the thing VS2017 does is copying all the necessary files to the remote target. Taking a close look to what has been copied, we have:

└── projects
    └── ConsoleApplication1
        ├── bin
        │   └── ARM
        │       ├── Debug
        │       │   └── ConsoleApplication1.out
        │       └── Release
        │           └── ConsoleApplication1.out
        ├── main.cpp
        └── obj
            └── ARM
                ├── Debug
                │   └── main.o
                └── Release
                    └── main.o

10 directories, 5 files
pi@NanoPi-M1-Plus:~$

We know that for that purpose, the IDE uses the previously configured ssh connection with the target. For that result we can use the same ssh connection to issue a rsync command, through a VSCode Task,
{
    // See https://go.microsoft.com/fwlink/?LinkId=733558
    // for the documentation about the tasks.json format
    "version": "2.0.0",
    "tasks": [
        {
            "label": "build",
            "type": "shell",
            "command": [
                "rsync -r -a -v -e ssh --delete --exclude '.vscode' $ {workspaceFolder}/ pi@192.168.0.102:/home/pi/projects/console-application/"
                ]
        }
    ]
}

Build project

With the same tecnique above we can also create the necessary folder structure and build our simple project
{
    // See https://go.microsoft.com/fwlink/?LinkId=733558
    // for the documentation about the tasks.json format
    "version": "2.0.0",
    "tasks": [
        {
            "label": "build",
            "type": "shell",
            "command": [

                ...

                "&amp;&amp;",
                "ssh pi@192.168.0.102",
                "'mkdir /home/pi/projects/console-application/build",
                "&amp;&amp; cd /home/pi/projects/console-application/build",
                "&amp;&amp; cmake .. &amp;&amp; make'"
            ]
        }
    ]
}

Debug

Last but not least we need a proper way to debug remotely our application. For that purpose we’ll configure a debug session using the VSCode C++ debugger features.
add-debug-config
First of all, from the debug launch dropdown menu

launch-over-ssh


{
    "configurations": [
        {
            "type": "gdb",
            "request": "launch",
            "name": "Launch Program (SSH)",
            "target": "./build/apps/console-application/console-application",
            "cwd": "${workspaceRoot}",
            "windows": {
                "ssh": {
                    "host": "192.168.1.2",
                    "cwd": "/home/pi/projects/console-application",
                    "keyfile": "C:\\Users\\mauri\\.ssh\\id_rsa",
                    "user": "pi",
                }
            },
            "osx": {
                "ssh": {
                    "host": "192.168.1.2",
                    "cwd": "/home/pi/projects/console-application",
                    "keyfile": "/Users/maurizioattanasi/.ssh/id_rsa",
                    "user": "pi",
                }       
            },
            "linux": {
                "ssh": {
                    "host": "192.168.1.2",
                    "cwd": "/home/pi/projects/console-application",
                    "keyfile": "/Users/maurizioattanasi/.ssh/id_rsa",
                    "user": "pi",
                }       
            },
            "preLaunchTask": "build"
        }
    ]
}

Demo

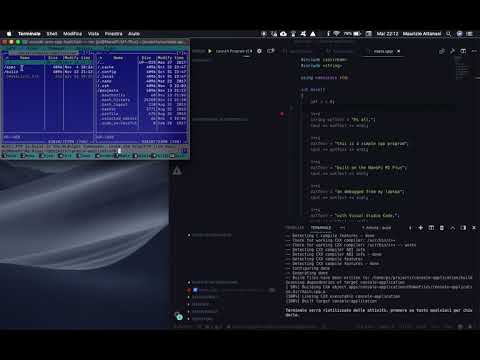
In the following video, available on my YouTube Channel, there is a short demo of the toolchain in action.


Watch the video

The code of this note is available here


Enjoy

lunedì 26 agosto 2019

Finding serial port names of usb to serial converters on window machines


As usual, this is a #noteformyself article on how to find serial port names of USB to serial converters on Windows® machines.

On Windows® operating systems, the main source of information of currently opened COM ports, and of COM port to which a certain USB converter has been attached to, is the Registry, and, more precisely, the following KEYS/KEY GROUP under the HKLM (HKEY_LOCAL_MACHINE) group:
  • SYSTEM\CurrentControlSet\Enum\USB;
  • HARDWARE\DEVICEMAP\SERIALCOMM;

Typical use is when software has to read some data from a USB device emulating a COM port (e.g. an Arduino® sending temperature and humidity read from a DHT11 sensor). Changing the USB port
will typically result in a COM port number change. 


There are many ways to avoid the necessity to change it in a configuration file, or even worst, recompiling the software, and many articles, blog posts suggesting good solutions for different programming languages.

I'll begin with three of the programming languages I daily use, C++ and C#, then a project for  TypeScript/JavaScript will follow.

C++ Demo

SerialPortFinder is the C++ project

C# Demo

USBInfo is a .NET/C# project.

All the code can be found on my Github repo at the following link.

Enjoy

giovedì 16 agosto 2018

Building an HMI with electron.js (Part 4).md

Like any professional application it would be nice to have an automated installer to package and distribute our work. Electron framework comes to help for this need. There are some alternatives available but the one we will test is electron-builder.
First of all we need to install electron-builder to our project. Because we’re using npm as the package manager for our project, in a terminal we’ll issue the command
> npm install --save-dev electron-builder
After that we need to add some sections to our package.json confinguration file.
...

  "build": {
    "appId": "com.maurizioattanasi.electron-hmi",
    "mac": {
      "target": "dmg",
      "icon": "src/assets/icons/mac/icon.png"
    },
    "win": {
      "target": "nsis",
      "icon": "src/assets/icons/win/icon.ico"
    },
    "linux": {
      "target": [
        "snap"
      ]
    }
  }

...
and a dist command in the script section to build and distribute the application itself
...

    "electron": "ng build && electron .",
    "electron-aot": "ng build --aot && electron .",
    "dist": "build"

...

As it can be seen in the build section we have three subsections win, mac and linux meaning that, depending on the platform on which we’re developing our app we can have an appropriate installer.
electron-builder-output
The image above is the output on my macbook resulting in the electron-hmi-0.0.1.dmg installer that can be found in the dist folder of our project.

Have fun, 😉


giovedì 2 agosto 2018

Building an HMI with electron.js (Part 3)

To achieve the desired result of this series of notes, we will rearrange our project in order to display some dynamic readings, and to do that we will use some of the building blocks introduced in some of my previous notes, as


More details and the code written for this note is available for consulting and comments on my GitHub Repository at the following link and an example of the result is represented in the following video.


In the next and last article we'll see how to make an installer to deploy and distribute our app.

Enjoy, 😉


sabato 17 marzo 2018

Building an HMI with electron.js (Part 2)

Building an HMI with electron.js (Part 2)

Let’s tak a step ahead in our journey toward the target of this notes that is, how to build an HMI runnable on different platforms using some Web Technologies.

Let’ add some TypeScript

The first step is to rearrange our project in order to introduce TypeScript.

  • First thing first, we’ll create a new folder named src wich will contain our TypeScript source files;
  • Then let’s rename our JavaScript files changing their extensions from js to ts, and move them from the root folder to the src folder. The content of the files will not change much, after all TypeScript is a superset of JavaScript. Infact the only thing that we’ll change are the const and let declarators that, in the spirit of the new idioma will become var;
  • Another change in the main.ts file is the relative path of the index.html file that will change into
'../index.html'
  • A major change is the introduction of the tsconfig.json file in the root of our project which specifies the root files and the compiler options required to build the project.
{
    "compilerOptions": {
      "target": "es5",
      "module": "commonjs",
      "moduleResolution": "node",
      "noImplicitAny": false,
      "sourceMap": true,
      "outDir": "dist",
      "baseUrl": ".",
      "paths": {
        "*": [
          "node_modules/*"
        ]
      }
    },
    "include": [
      "src/**/*"
    ]
  }
  • Finally, we have to add some changes to our packag.json file, and in particular, we’ll add a build script that will invoke our TypeScript compiler tsc
"build": "tsc",

and then we need to modify a little our start script as follows:

"start": "npm run build && electron ./dist/main.js"

so that, in a few words, it will initially compile our TypeScript project, and then launch the application passing to the electron command the resulting main.js file.

Figure 2 - Running the TypeScript version

The code written for this note is available for consulting and comments on my GitHub Repository at the following link.

For now that’s all folks.

Enjoy, 😉


giovedì 1 marzo 2018

Building an HMI with electron.js

Building an HMI with electron.js

As an engineer involved in the last two decades in design and development of complex systems in different fields such as Industrial Automation, Internet Of Things, and lately in Virtual/Augmented Reality aided Training Systems, one of the tasks to face with is the development of different HMI clients to allow the interaction between the end user and the above mentioned systems.

This note, and the attached project, freely available on my github repository, is aimed to identify a set of technologies that will allow the realization of those interfaces independently, as far as possible, from the hardware and operating system platform on which they are intended to run. Independency, in my humble opinion, is, and will be, a key concept, that will allow system engineers to scale all the components to the real needs and to the budget available to accomplish the requirements of a project.

Among all the different techonologies available on the market nowadays, the only ecosystem that is really cross platform is the one centered on the javascript programming language. Neither Java or .NET are capable of such a capillary diffusion natively. The language once used only for client applications running in a browser, thanks technologies like Node.js make its use allowed server side also. There’s a lot of tools and libraries borrowed from the Web Applications field that make the implementation of appealing user interfaces really simple. Boxing all this stuff in a desktop application runnable on Windows, Linux or even macOS, is really straightforward with frameworks such as electronjs.

The only caveat toward the use of plain javascript for large applications is in the nature of javascript itself or in the fact of being a loosely typed programming language. This fact made me, and many other old style programmers I suspect, suspicious respect the use of this idoma, but when I first read about TypeScript, a superset of Javascritpt introduced by Microsoft, that introduces types in JS, I felt very curious, and, a I always do with those kind of things, I began to study, and to search for some tools that hopefully will allow me to achieve the target that is to implement an HMI capable to connect and communicate over some channels and to run on my macbook, on a Windows pc/laptop and also on a tiny Raspbery Pi.

Development workstation setup

Let’s begin preparing to necessary to build do our application. To prove that the final product is really cross platform I will use a Macbook Pro with macOS High Sierra ver. 10.3.3 as my main development machine and a Windows 10 Pro laptop and an Ubuntu Server 16.04 LTS machine to repackage and test the resulting application.

To install all the necessary packages and frameworks I’ll make use of package managers, and, in detail:

Node.js

Node.js

First of all we need to have node.js, the javascript runtime, installed on development machines. I prefer using an LTS version, that, at the time of writing is 8.9.4 LTS. We can download the installer for the desired os from the node.js site, or we can use the above mentioned package managers.

On macOS, on a terminal we’ll issue the command

MacBook-Pro-di-Maurizio:/ maurizioattanasi$  brew install node@8

which will download and install the latest release of version 8. After the installation process terminates, on the same command line we’ll state the following command:

On a Windows system, with Chocolatey installed, on a command prompt, we’ll use the command:

C:\> choco install nodejs-lts

On Debian/Ubuntu machines, we’ll use:

m***@m***-server:~$ apt-get install -y nodejs

Node installation check

After the installation process, on a command promp (or Terminal), we’ll issue the command node -v to check the current version of node, and npm -v, to check the current version of npm.

MacBook-Pro-di-Maurizio:/ maurizioattanasi$ node -v
v8.9.4

that tells us that we have installed the desired version. As a side effect of installing node.js, we have also at our disposal the *Node Package Manager a.k.a. npm. To check the npm version, on the terminal, we’ll issue:

MacBook-Pro-di-Maurizio:/ maurizioattanasi$ npm -v
5.6.0

TypeScript

TypeScript

By installing TypeScript we mean the TypeScript compiler, named tsc that is the main component needed to compile TypeScript code into plain JavaScritpt. Having npm installed on our development machines, this step is quite straightforward. On a command prompt, or a terminal, simply type:

MacBook-Pro-di-Maurizio:/ maurizioattanasi$ npm install -g typescript

then hit enter. After completion we’ll have tsc, the TypeScript compiler, installed globally (-g switch applyed to the npm command). To check the version installed, as usal, type:

MacBook-Pro-di-Maurizio:~ maurizioattanasi$ tsc -v
Version 2.6.2

Perfect! We have node.js version 8.9.4, npm version 5.6.0 and TypeScript version 2.6.2 installed on our machine. From now on we only need a text editor, one with which we feel at ease, and we can start writing down some code.

Project setup

To start a node project we’ll use npm again:

maurizioattanasi$ npm init -y

that will result in a package.json file which content will be similar to:

{
  "name": "electron-hmi",
  "version": "1.0.0",
  "description": "Demonstration project to explore the possibilities offered by multiplatform technologies such as node.js, typescript and electron, in **H**uman **M**achine **I**nterfaces (HMI) development.",
  "main": "index.js",
  "scripts": {
    "test": "echo \"Error: no test specified\" && exit 1"
  },
  "repository": {
    "type": "git",
    "url": "git+https://github.com/alien70/electron-hmi.git"
  },
  "keywords": [],
  "author": "",
  "license": "MIT",
  "bugs": {
    "url": "https://github.com/alien70/electron-hmi/issues"
  },
  "homepage": "https://github.com/alien70/electron-hmi#readme"
}

electronjs setup

Electron

Following the instructions on the npm page for electron, on the terminal:

maurizioattanasi$ npm install electron --save-dev --save-exact

or

maurizioattanasi$ npm i electron -D -E

at the end we’ll have the package.json file

  "devDependencies": {
    "electron": "1.8.2"
  }

First electron app… The JavaScritp way

<tldr></tldr>

Following the electron tutorial Writing Your First Electron App
, we’ll create a main.js file and a index.html file and we’ll modify the package.json as follow:

...
  "main": "main.js",
  "scripts": {
    "start": "electron ."
  },
...

Now we can try our application running…

maurizioattanasi$ npm start

…and, here we have our first web based desktop application.

Figure 1: My First Electron HMI

The next step is to replace the JavaScript code with TypeScript.

Enjoy